

It's back! It's been a few months since I did a Photo Know-How but I am trying to get back into the groove of things and I have a few ideas for the next few weeks... but, if you have any requests, please let me know - I'm more than happy for new ideas!
Today I'm going to talk a bit about working with winter light and in almost 'no light' conditions. Berlin is pretty grey in winter. I can count on one hand the days that I've seen blue sky since November. If you read my blog you probably know all of them - they are such a rarity here that I get so excited that I almost always mention them here on Pampelmuse and Me. On top of that the daylight hours are short (9am-4pm) so I'm usually photographing in the dark. I don't have any fancy photography equipment - I use a Canon 400D and although I would love one, I haven't got an external flash.

So, what have I learnt:
1. Get a tripod; you can make your own (books, sweaters, chairs) or buy one. The advantage of a "proper" tripod is that you can manipulate the height a lot better than a stack of books and it gives you a lot more flexibility as to where you set-up your photos. In low light conditions you need to have a stable surface - your shutter speed will almost always be too slow for hand held photography unless you use a flash.
2. Learn how to use your self-timer; even if you are using a tripod, at slow shutter speeds pressing the shutter will move your camera ever-so-slightly resulting in a blurred photo. Using the self-timer (or a remote shutter) will keep the camera absolutely still while you take your photo. Remote timers are one of the cheapest investments you can make in terms of photography - you can pick them up for as little as $5 and they are also great when taking self-portraits.
3. Custom White Balance; I used to think custom white balance was more effort than it was worth. In most lighting conditions I think the Auto White Balance setting (AWB) on most cameras does a pretty good job and in low-light conditions I used to just switch to Tungsten for a bit more accuracy. Plus, I generally shoot in RAW where you can adjust the white balance to your liking in the editing phase. But... I've found that neither AWB or Tungsten do a very good job in my apartment at night - the lighting is just too poor. Custom White Balance has been incredibly helpful during my post-work photography shoots - no fancy equipment required either, I use my white dinner plates as my white balance reference.
4. Turn off your flash; Unless you have an external flash you are probably going to get "flashy" photos with your cameras in-built flash. Switch to Aperture Priority or Manual mode, turn off your flash and embrace the slow shutter speeds.
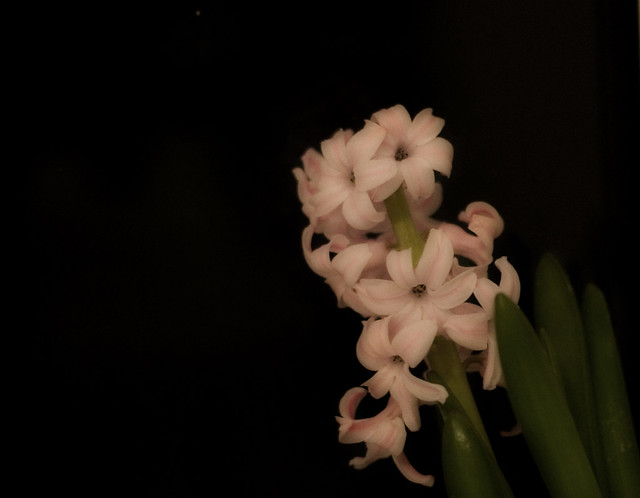
These two photos were both taken at around 8.30pm in my apartment. No flash or any special lighting was used. In the first photo I slightly desaturated the colours, but didn't do much else in the editing phase. In the second photo the background is my kitchen window. When I was editing, I brought out the blacks a little more so that the small amount of reflection from the window disappeared making it look like a black surface.
4. Crank up the ISO; Generally I hate increasing my ISO, but sometimes is necessary. The downside will be that, especially with less sophisticated cameras, you'll get a lot of noise - and quickly. My camera starts getting "noisy" with ISO800. Instead of hating it, embrace it - there are times when the grain can enhance a photo. Grainy photos often look better in black and white so if you're unhappy with your colour photo, try a black and white edit.
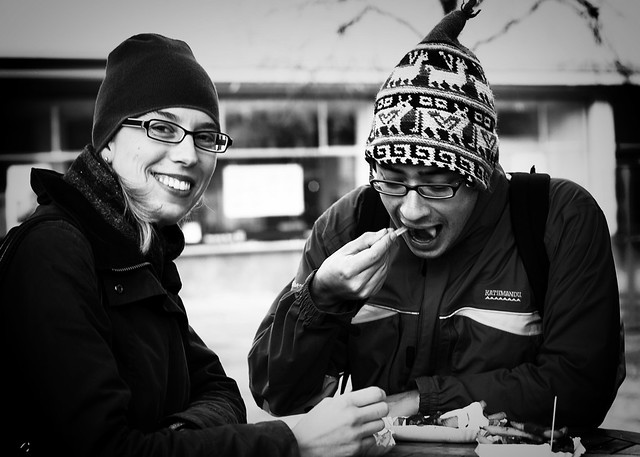

This trick also works well with outdoor night shots where bright street lighting can sometimes overpower the shot - a simple black and white conversion calms the lights down and can bring out the details that you initially saw with your eyes.

14 comments:
Excellent post, Clare. It brings together all those things I kind of knew but needed to really think about.
I am glad "Photo Know-how" is back! Love your posts! Same problem here with the darkness, I am so much looking forward to spring. Those grey days never seem to end :)
Have a nice weekend, Kristina
Currently I am using books as a tripod too. It works fine at home, but not so great when out and about1
I always forget to get my tripod out and then I get shutter shake in low light, what remote trigger do you have for your canon? I must get one. I hate the constant grey days at the moment, not good for the soul.
Going to have to try this...need a better tripod. Great lesson, glad they are back!
what a great post! (and just in time as I figure out my new camera!)
Wonderful post and excellent tips. I hate using a tripod and tend to use whatever light I can find to meter off of...and then crank up my ISO. I embrace the noise. :)
this is awesome, thank you!
Great tips. I'm going to have to write some of it down so I can remember to use it! Ok, I need a photo tips notebook or something...
I always end up taking food shots at night after cooking for my blog posts and they are so icky. Will have to see if I can get some better results with RAW and your other tips ;)
Wonderful post with great tips - thanks! Have a lovely weekend. Di
Must score #1 and must figure out #2! Thanks for the PSA!
I adore the cup and the flower! So cute!
I love your Know How Series - I always walk away with a few ah-has!
great tips. for my self portraits, I plant my camera wherever I can, ha. it is a lot of fun. I did not know high ISO makes pics grainy. thanks for the tip.
Post a Comment