Showing posts with label Photography Basics. Show all posts

18.2.11

The case for Manual Mode


By now if you've been reading along with this series you should have some understanding of the three basic element of photography - ISO, shutter speed and aperture - have a basic understanding of manual mode and some concept of colour compensation.  Today I'm going to try to convince you as to why manual is in fact easier to use than other semi-automatic modes, especially when you are trying to create specific moods in your photos.  Having said that, it's not always the best mode to use, in certain situations allowing the camera to do some of the thinking will produce the best results.
02_18_manualmode
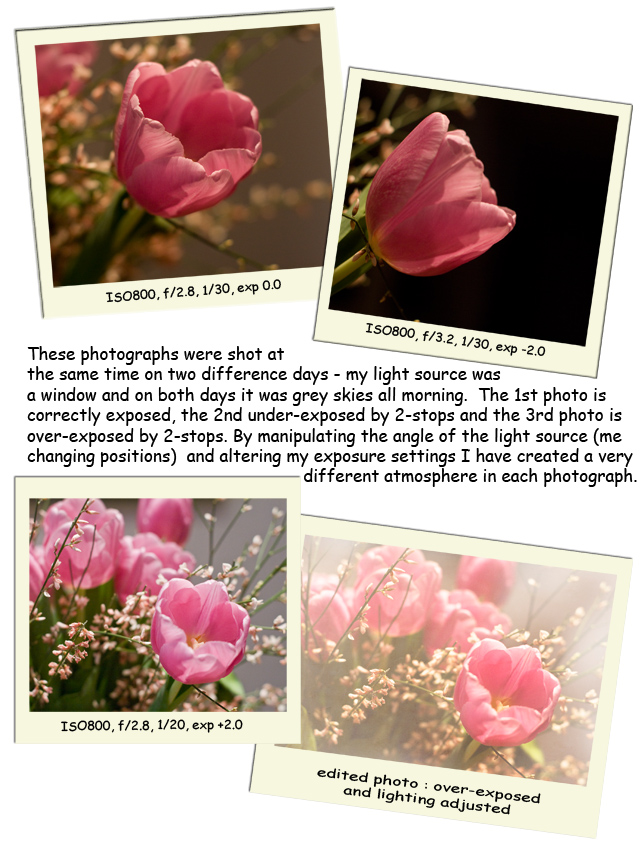
** The text should read : These photos were shot at the same time on two different days (bad typo - sorry!)

Creating these three different exposures or moods using Shutter Priority or Aperture Priority would be quite bothersome.  On my camera it would be a two-step process that involves me holding down one button while adjusting my shutter speed or aperture with the other and setting the light meter to under-expose or over-expose.  Definitely possible, but a bit of a pain.  In manual all I need to do is adjust my shutter speed up or down so that the light meter in my view finder is showing that the photo will be under or over-exposed.  If that all sounded like gobbeldygook then head back here for a refresher.

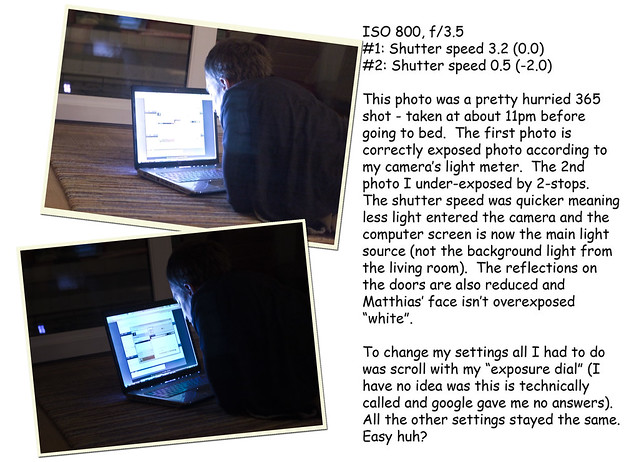
Here's another example of when manual mode was much better than aperture priority, shutter priority or automatic.
02_18_manualmode_II

If you are approaching manual mode for the first time it can seem a little daunting.  Practice is the key and mistakes, especially in photography, almost always teach you something.  Here is how I approach manual mode.  It's not the only way, or necessarily the best way, but it works for me.

Step 1.  White Balance: What conditions are you going to be photographing?  If you are inside or under fluorescent light consider setting your White Balance to Tungsten or Fluorescent.  If you want to enhance a sunset, think about switching to a Sunny White Balance.
Step 2. Select your ISO: Usually you'll be photographing in similar conditions for a while, select or check that your ISO is logical for your current "photo session"
Step 3.  Composition:  Ask yourself what "story" or "message" you want to convey in your photos.  Can you recompose the image to make this message clearer?  Think about Andreas Feiniger's three prinicples of exploration, isolation and organisation
Step 4.  Aperture:  What aperture do you want?  Do you want everything focused or only a small aspect of the photograph?  With P&S cameras switch from landscape (the mountain), to action (a running man) or close-up (usually a flower), with a dSLR consider the aperture that you want
Step 5.  Colour Compensation: What is the main colour of your photograph?  Should you consider over or under exposing to achieve the best colour range in this photo?
Step 6.  Adjust the shutter speed:  Adjust the shutter speed based on your decision about colour compensation and the atmosphere in your photo - dark and gloomy or bright and ethereal?
Step 7.  Assess your shutter speed:  Will you get camera shake at this shutter speed?  Do you need to adjust the ISO and/or aperture to get a crisp image?
It may seem like a lot, but a lot of these steps need only be done once or twice, especially if the light conditions stay the same and you'll only need to make small changes to your shutter speed.

11.2.11

Switching Focus

Today I want to talk a bit about composition and framing your shots.  The idea of this post has been rattling around in my head for a little while, but it was only on reading David Praekel's book 'Composition' yesterday that I felt like my ideas really crystalised into a coherent picture.  Incidentally, I have quite mixed feelings about Praekel's book and it is probably not a book that I would recommend you buy (if you so happened to be asking), but in this instance it proved incredibly useful and I'm all about giving credit where credit it due.  Anyway, onto the post.

One of the simplest ways to improve your photography is to practice composition and begin to be mindful of the stories you are telling through your photos.  It is very easy to imagine the result that we want in our heads, but translating that image into a photograph can be challenging and goes a long way beyond just lining up the viewfinder and pressing the shutter.  At it's most complex it involves a mastery of the technical aspects of manual photography but it is also about framing your images, changing angles and shifting your focus.  

No one gets composition right immediately, it takes years of practice to be able to "nail" a photograph in one shot.  The best way to improve your 'eye' and your understanding of composition is to pick a subject and take several photos of it from different viewpoints and angles.

It's all very well to say, take "take several photos" but unless you have a 'process' and some thought behind what you are doing you will end up taking 10 or 20 photos with all of them turning out to be rubbish.  For the next part of the post I'm going to refer directly to David Praekel's book.  He refers to another photographer - Andreas Feininger - who describes three fundamental aspects of composition: to explore, to isolate and to organise and suggests that by approaching your photography with these three aspects in mind you will naturally become more "mindful" about composition. 

Exploration begins before you even pick up your camera.  Think about what you want to say with your photograph.  Look at the subject from different angles - how is the light affecting your subject ? How is the subject interacting (or not) with the background?
Isolation is the process of refining your mini-brainstorming session to ideas and photos that you think "will work".  It may include choosing an appropriate lens, shutter speed or aperture but also includes  thinking about how you will frame your image. 
Organisation is the process of actually composing your image within the viewfinder.  At this point take a few photos, including an angle or 'idea' that pushes the boundaries of  your current  photography skill set.  Sometiems it is the angle that you least expect, or try last, that ends up being the "winning shot".
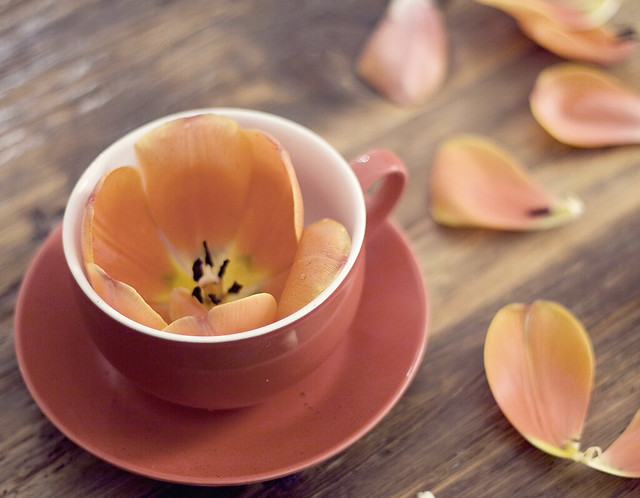
Exploration: The idea for this photo came from some tulips that were sitting in a vase on the table.  They were so big and I somehow wanted to show this by placing them in a huge coffee mug.  I also had the idea of drinking the tulip to somehow symbolise "drinking spring" and the petals to symbolise colourful snowdrops.  There were a lot of ideas bouncing around in my head - I don't always think about my 365 photos so much, but this time I did.  
Isolation: In order to capture some of my ideas I decided my photo needed to be a Bird's Eye View Shot.  I wanted a wide aperture (less than f/3.0).  I contemplated putting out a tablecloth because I think the grain of our dining table is distracting, but in the end I just went with it. 
Organisation: I took several photos at different angles and I actually like a few of them.  I also tried a self-portrait series, but these didn't quite work the way I imagined.  In the end I settled for this close crop.  When I was editing the photo I desaturated the image because I didn't like how prominent the wood grain was.  On reflection I actually like the brighter images, thankfully I can always go back and change it again!
At this point I think it is worth mentioning that unless you have very patient friends or family it is worth practicing these things on inanimate objects, such as gloves and coffee cups.  With time thinking about these things will come naturally and you will begin to incorporate them into all the photographs that you take and your friends and family will be happy that you didn't make them sit still for half an hour while you nailed your shot!


28.1.11

Colour Compensation

Have you ever noticed that sometimes, despite apparently exposing your photo correctly it ends up looking a little wishy-washy and blah? To understand a common reason why this happens you need to understand how the camera's light meter measures light.

Camera's "meter" (read light) by sampling areas within your camera's frame and deciding what settings will, on average, bring everything back to a mid-grey.  This generally works pretty well, but a camera's internal light meter tends to "make mistakes" when you are taking pictures with extremely bright or dark areas or if there is a lot of white or black in your photos.


How to adjust the bright/shade problem in photos is a topic for another week.  The other problem you run into is when you are dealing with mostly white or mostly black photos.  It is not surprising that, with the camera's light meter trying to make everything mid-grey, photos with lots of white or lots of black will tend to look grey if you take your photo with the exposure settings that the camera suggests.

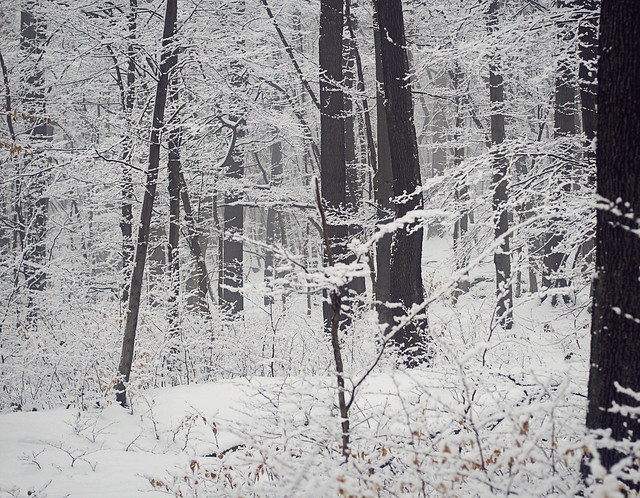
Yesterday I took a walk in the forest and took a lot of photos of the fresh snow. Perfect opportunity to take some picture to show you how to think for your camera when photographing whites and blacks.
In the first photo I used the settings that the camera suggested - it's pretty dark and the white is a little grey.  The second photo is better and by over-exposing the photo to two stops (+2) above what was suggested by the camera's in-built light meter I got a photo I was happy with.
Finished photo - which has been sharpened slightly for the web.

The same concept applies for photos mostly of black.  The camera slightly over-exposes black to try to bring the tones back to mid-grey.  If we trick the camera by under-exposing the image slightly our blacks will be true black.

But how much should we over or under expose in normal conditions?  Well that depends on the photograph and what you want to be correctly exposed.  White and Black tend to need around 2 stops over or under exposure to get the correct colour.  Mid-green, red and mid-blue will generally be correctly exposed at the "true exposure reading".  Colours brigher than red (yellow, orange, skin tones) will need anywhere between +0.5 and +2 stops and darker colours will fall somewhere between -0.5 and -2.0
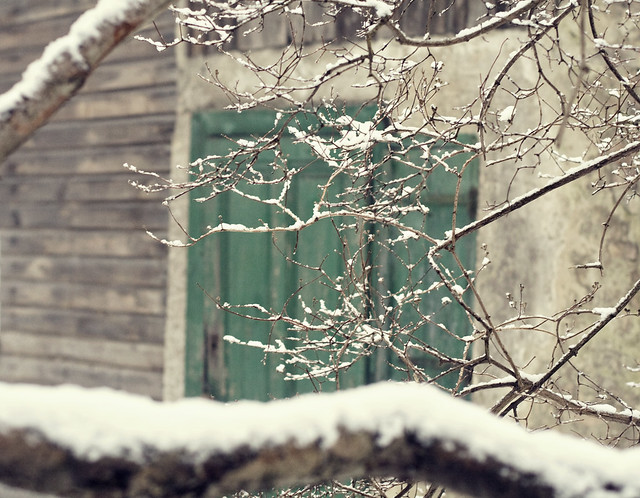
Barn Door

Metering using an external light meter, or grey-scale card is a much more accurate way of correctly exposing a shot, but the loose rule-of-thumb above will take your photos a long way.  If it doesn't work out you can always change your settings and take another photo.  

Intentionally over or under-exposing your photos is possible in all modes on your dSLR cameras, some bridge cameras and even some point-and-shoot cameras (although it is by far the easiest to manipulate when you use manual mode).

21.1.11

Winter Light


It's back!  It's been a few months since I did a Photo Know-How but I am trying to get back into the groove of things and I have a few ideas for the next few weeks... but, if you have any requests, please let me know - I'm more than happy for new ideas!

Today I'm going to talk a bit about working with winter light and in almost 'no light' conditions. Berlin is pretty grey in winter.  I can count on one hand the days that I've seen blue sky since November.  If you read my blog you probably know all of them - they are such a rarity here that I get so excited that I almost always mention them here on Pampelmuse and Me.  On top of that the daylight hours are short (9am-4pm) so I'm usually photographing in the dark.  I don't have any fancy photography equipment - I use a Canon 400D and although I would love one, I haven't got an external flash.

So, what have I learnt:
1. Get a tripod; you can make your own (books, sweaters, chairs) or buy one.  The advantage of a "proper" tripod is that you can manipulate the height a lot better than a stack of books and it gives you a lot more flexibility as to where you set-up your photos.  In low light conditions you need to have a stable surface - your shutter speed will almost always be too slow for hand held photography unless you use a flash.
2. Learn how to use your self-timer; even if you are using a tripod, at slow shutter speeds pressing the shutter will move your camera ever-so-slightly resulting in a blurred photo.  Using the self-timer (or a remote shutter) will keep the camera absolutely still while you take your photo.  Remote timers are one of the cheapest investments you can make in terms of photography - you can pick them up for as little as $5 and they are also great when taking self-portraits.
3. Custom White Balance; I used to think custom white balance was more effort than it was worth. In most lighting conditions I think the Auto White Balance setting (AWB) on most cameras does a pretty  good job and in low-light conditions I used to just switch to Tungsten for a bit more accuracy.  Plus, I generally shoot in RAW where you can adjust the white balance to your liking in the editing phase.  But... I've found that neither AWB or Tungsten do a very good job in my apartment at night - the lighting is just too poor.  Custom White Balance has been incredibly helpful during my post-work photography shoots - no fancy equipment required either, I use my white dinner plates as my white balance reference.
4. Turn off your flash; Unless you have an external flash you are probably going to get "flashy" photos with your cameras in-built flash.  Switch to Aperture Priority or Manual mode, turn off your flash and embrace the slow shutter speeds.
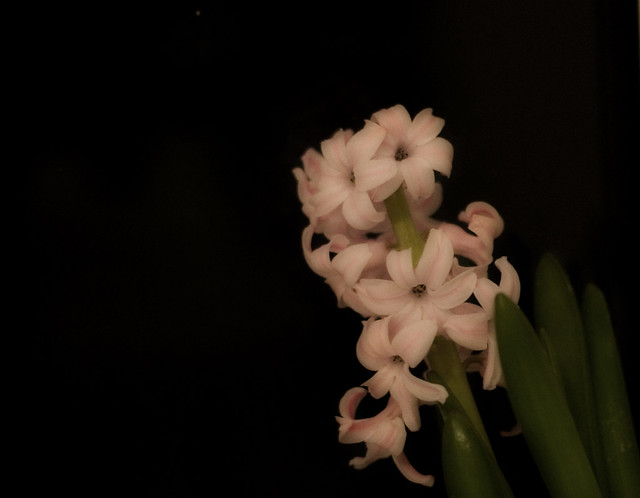
Hyacinth
These two photos were both taken at around 8.30pm in my apartment.  No flash or any special lighting was used. In the first photo I slightly desaturated the colours, but didn't do much else in the editing phase.  In the second photo the background is my kitchen window. When I was editing, I brought out the blacks a little more so that the small amount of reflection from the window disappeared making it look like a black surface.

4. Crank up the ISO; Generally I hate increasing my ISO, but sometimes is necessary.  The downside will be that, especially with less sophisticated cameras, you'll get a lot of noise - and quickly.  My camera starts getting "noisy" with ISO800.  Instead of hating it, embrace it - there are times when the grain can enhance a photo. Grainy photos often look better in black and white so if you're unhappy with your colour photo, try a black and white edit.
Eric and Harriet
62/365: Pasternak
This trick also works well with outdoor night shots where bright street lighting can sometimes overpower the shot - a simple black and white conversion calms the lights down and can bring out the details that you initially saw with your eyes.

29.11.10

Going manual

Today we're going to be talking about manual mode.  Most of this information will only be applicable to bridge and DSLR users. My P&S (point and shoot) does have a manual mode settings, although it is cumbersome to use and to be honest I think that P&S cameras take better photos with auto-settings.  

Having said that, if you have a P&S camera and you want to give manual a try have a look if your camera has something called "M" or manual.  On mine I can adjust the exposure to over or under expose, select the white balance, choose Sepia or B&W and change the filter.  This is enough to help you experiment with over and under exposure.

But onto manual.  In manual we are going to control the aperture, the shutter speed and the ISO.  I always start with ISO as I can generally pick which ISO setting I'm going to need in a given situation. 

ISO 100 - 200 : bright, sunny days and good lighting situations
ISO 400 - 800 : dim or poor lighting
ISO 1600 +: night time, inside old buildings 

I use a Canon 400D and I don't really like going above ISO400 due to the noise that I get at higher ISO (see back to ISO for a recap).  Newer and more sophisticated Canon dSLR (50D, 5D Mark II, 7D) give you better ISO ranges.  With Nikon cameras the lowest you can go with ISO 200.  You will need to experiment with your own camera to know what ISO range is good for you.

Once the ISO is set, I decide which aperture I want.  This is based mostly on the depth of field that I am after.  If I'm taking a picture of a flower I might choose a wide-open aperture (f/2.8).  If I want to take a landscape shot I might choose a narrower aperture like f/16.

The third step is to adjust your shutter speed.  Move your shutter speed up or down until your photo is correctly exposed.  Your photo is correctly exposed when the meter bar is sitting in the middle of your level.

Notice how I didn't say that this was the last step?  Well, now you need to take a look at your settings.  Is this shutter speed realistic?  If it is too slow and you are worried about camera shake you need to adjust either the ISO or the aperture.  I always adjust the ISO first (if possible).  Once you have adjusted the ISO you will need to slightly shift you shutter speed again until your meter bar is sitting in the middle of your level.

Still too slow and you've reached your maximum ISO range?  Now you need to adjust the aperture, until you are happy with the shutter speed.

Often if you're taking photos in similar lighting conditions you will only need to do this only once, the settings will stay roughly the same as long as you're not dipping in and out of shade and you can just snap away.

However, it stills seems pretty time consuming, right?  And you can achieve much the same effect with aperture priority, huh?  Yes, and often aperture priority will give you the results you are after - but only if you don't consider metering.  

Next week: Metering


22.11.10

Black and White


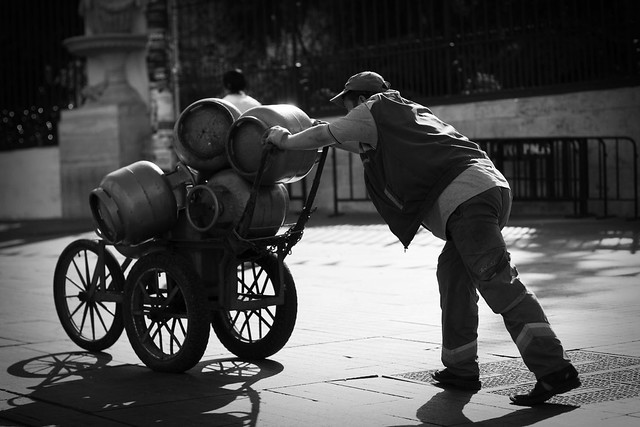
Pushing Cans
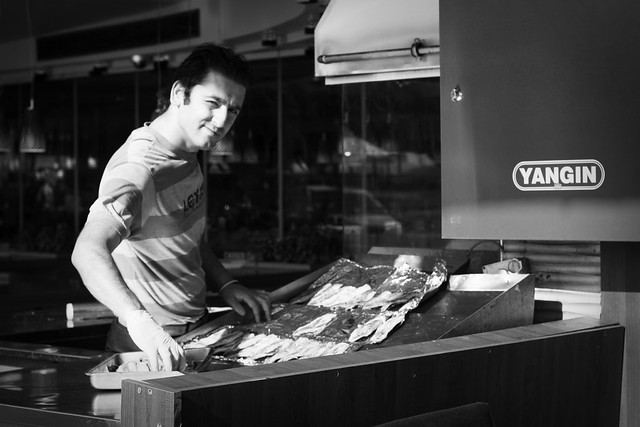
Dried Fish
The photos above are two of my favourites from my trip to Istanbul in September.  Funnily enough, they were rubbish straight out of the camera and I thought about deleting them before I started editing.  Both had distracting highlights and shadows and in the second photo one side of the man's face was completely over-exposed. But problems in the colour versions became features in black and white.    

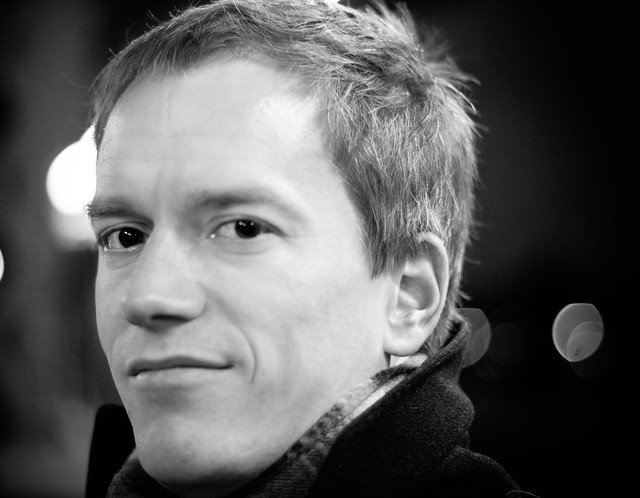
Here's a second example, a photo I took of Matthias while we were waiting at the train station on evening recently.  The straight-out-of-the-camera (SOOC) is not bad, but the over-exposed halos from the lights are a little off-putting and the change in background from left to right looks weird.  The white balance is also not quite right and he's skin is a bit jaundiced.
Matthias
In black and white, the light above his right eye is still a bit distracting, but overall I like the picture a lot more.  This trick for 'saving' photographs works best if you're unhappy with the color composition in some way, or if the shadows and highlights are too harsh.  Unfortunately it won't save an unfocused or badly composed shot.

Next week: Metering

15.11.10

Amazing Aperture - Part II


Last week I talked about how aperture can be used to control the amount of light entering into the camera.  This week, I'm going to go through the basics of depth of field or focal length.
ISO400, f/4.0, 1/125

As we learnt last week large apertures of f/1.4 - f/3.5 are wide and allow a lot of light into the camera.  They also create very shallow depth of field.  This allows you to focus in on one aspect of your photograph and blur the rest of the foreground and background.  Lenses with large apertures tend to be used for still-life and portrait photography where it is useful to be able to blur unwanted distractions.
ISO100, f/10.0, 1/160

In contrast, small apertures of f/16, f/22 are very narrow.  They have very large focal ranges and tend to be used when you want everything in the photo to be in focus.  Landscape photography uses narrow apertures to allow both the foreground and the background to be equally focused so the viewer gets a panoramic view of the scene.

The diagram below helps to explain the relationship between aperture, distance and focal range.  It's from Christopher Russo (I googled aperture and came up with this).
Figure 1 has a wide aperture eg. f/2.8 and the camera is close to the main subject.  You can see from the areas shaded in green that the focal distance is small.  Only the yellow person will be in focus and the foreground and background people will be blurred.
Figure 2 also has a wide aperture (f/2.8) but this time the camera is further away from the subject.  The focal distance has been increased and more area is in focus, although the grey people are still a little bit blurred.
Figure 3 has a narrow aperture (eg. f/16) and the camera is close to the main subject.  All the subjects are in focus.  The narrow aperture has increased the depth of field.

If you're anything like me, reading these diagrams and the explainations will make your head hurt with little improvement in understanding.  It wasn't until I actually understood aperture that I understood the diagrams - but I put them there incase they help someone. The best way to get a grasp of aperture and depth of field is to play around with it and see what you can do. To give you a head start I'll show you the photos from last week again.
Instead of concentrating on the shutter speed and light aspects of the photos, look at how the background changes from semi-focused to almost completely blurred as the aperture is widened.  This is the depth of field becoming smaller as the aperture is widened.

If you have a P&S, you can partially control the aperture by adjusting the settings.  When you select 'landscape' your camera will choose a narrower aperture to maintain focus throughout the photograph.  If you select portrait it will use a wider aperture and attempt to blur out some of the background.


Next Week : Black and White


8.11.10

Amazing Aperture


This week we're talking about aperture.  For me, aperture is where the real fun of photography is, but it's also the most counter-intuitive.  Aperture does two things - it is another way of controlling how much light your camera receives and it also controls your depth of field.  Depth of field is a fancy way of describing how much of your photo is in focus.  These two aspects interact, but I'm going to explain them separately as this makes the most sense to me.  

Aperture as a control mechanism for light.

Loosely defined aperture is how wide your camera's shutter opens when it takes a photo.  This is different to shutter speed.  Shutter speed is how quickly your shutter opens.  I'm a visual learner and I find that the easiest way to explain this is via a "clapping" demonstration.
66/365 : Rain
1. Bring your palms together in a prayer or clapping position.  Now, slowly move your hands out until they are about 30cm apart and then bring them back together.
2. Repeat this process, but this time do the movement quickly.  
3. The difference between step 1 and 2 is shutter speed.
4. Repeat step 1 (seriously)
5. Now, repeat this process at the same speed, but this time only separate your hands by 10cm
6. The difference between 4 and 6 is aperture.

7.  Repeat, draw a diagram, say it aloud.  Learn the difference.  It's important.

Aperture is measured in f-stops with the narrowest being around f/22 and the widest f/1.2.

Looking at the diagram above it is easy to imagine which lets in the most light.  F-stop numbers such as f/16 and f/11 let in a smaller amount of light compared with f/4 and f/2.8.  Notice how I've resisted using the terms "bigger" and "smaller" - that's because when we talk about aperture, the bigger apertures are f/2.8, f/1.4 and the smaller apertures are f/16 and f/11.  

Aperture as a mechanism for controlling light matters (again) in poorly lit situations.  As well as raising the ISO to increase the amount of light reaching the camera (see ISO post here), we can also increase the aperture.  A wider aperture such as f/2.8 will let in more light which will allow us to have a quicker shutter speed.  If you're confused about this, do the clapping demonstration again and imagine the amount of light entering through your hands while they are separated.
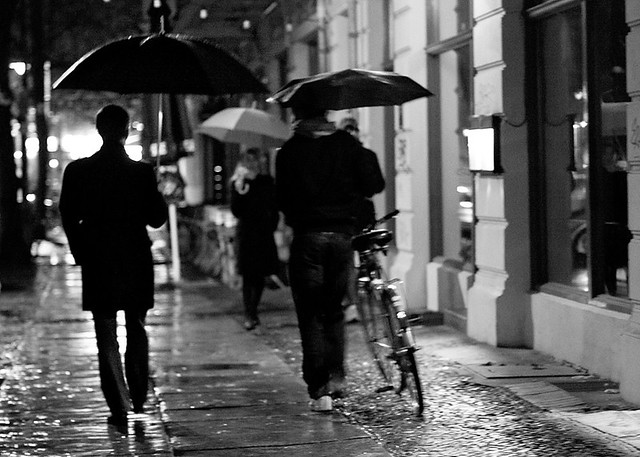
In these three photographs I set my camera to Aperture Priority and the only thing that I changed was the aperture.  In order to correctly expose the photograph the camera had to have a faster shutter speed to compensate for the wider aperture setting.  (Note: Lenses with wide aperture are often called quick for this reason). The only other difference between the first photo and the two below is that I edited it slightly to increase the colour saturation of the foreground flower to make it stand out a bit more.


Next week: Aperture as a mechanism for controlling depth of field

1.11.10

Reflections


Short and sweet this week, but a great effect...

Over the last couple of weeks we've been talking about ISO and Shutter speed.  I thought it might be fun to turn back to composition.  Today I'm going to be teaching you all an incredibly simple trick which can give you really cool effects.  It's also a technique that is difficult to execute unless you use Program Mode or Automatic and can be done with any camera.  Today we're talking about reflections.

reflection

First step:  Set your camera to program mode or automatic.  If you're using automatic, make sure you switch the flash off.

Second step: If you can, adjust your ISO to an apropriate level

Third step: Find some water - it doesn't have to be particularly deep or big - the photo on the left was taken using a muddy puddle which only had about 1-2cm of water in it.

Fourth step: Try to get your camera as close to the water as you can, without actually touching it.  The camera body and lens should be at a 90 degree angle to the water surface.

Fifth step: Take your picture! 

Sixth step: Have a look and laugh about how bad you are at keeping your camera straight.

Seventh step: Repeat steps 4-6 until you are happy with the photo (be patient, you'll get better at it).

That's it!

I told you - easy-peasy.  And you can do this with almost any body of water.  The best reflections will come when the water is still, although you can get some creepy looking effects with all the trees going loopy by throwing a few sticks into the water as you take the shot.

Fun, huh?

Next week: Aperture

25.10.10

Isolating ISO


Two weeks ago we talked about shutter speed.  This week it's all about ISO.  Most automatic cameras will allow you to play with ISO.  Get out your manual (yes really) and see if this option is available for your camera, it's something everyone can use to improve their picture taking skills. My Canon IXUS has an ISO range from 80 - 1600.

ISO stand for "International Organisation for Standardisation" and comes from the greek work isos, meaning equal.  I find it easiest to understand ISO if I think about film photography.  Film photography is based around the concept of light passing through a material (film) and the film absorbing the light to differing amounts to create a 2D image.  Here there are two things interacting with each other - the amount of light reaching the film and how reactive the film is to light.  ISO describes the second element - the films potential to absorb light.  The higher the ISO, the better the film is at capturing light.  Put another way - film with a high ISO allows you to take photographs in situations without much light.  If you are using a film camera, as a general rule, you cannot simply "change" the ISO but need to choose different films with different characteristics.
Photo 1934 by Marianne Breslauer 

Now, lets convert that knowledge into digital photography.  The same concepts can be applied here.  The higher the ISO, the more light sensitive the camera is and the better it is at taking pictures in dark situations.  A fortnight ago we talked about the relationship between shutter speed and camera shake, and how without a tripod, at slow shutter speeds your photos will be out of focus due to your hands natural shake.  One way to get around this in dark situations is to increase the ISO.  The camera will now need less light to capture the same  image and you can use a faster shutter speed  (and therefore avoid a tripod and blurred photos). 

800_lights
ISO 800, f/1.4, 1/160

200_lights
ISO200, f/1.4, 1/25

The above pictures aren't the greatest of subject material, or quality, but I was a little rushed lastnight trying to finish off this post (oops).  But they still illustrate the point I wanted to explain.  In the first photo at ISO800 I could use a shutter speed of 1/160, whereas to capture the same image with my ISO set to 200 I needed a shutter speed of 1/25.

The downside of a high ISO  is that you sometimes get grainy images.  This is commonly referred to as "noise".
In digital photography the noise is caused by the camera not "seeing" the colours correctly and blurring pixels together.  How well your camera 'sees' at higher ISO range is, unfortunately, really a cost thing.  The more expensive the machine, the better it is at coping with the higher ISO ranges.  However, you can still use even small ISO ranges (100-400) to your advantage, as I will explain in the next few weeks.

Next Week: Capturing Reflections

18.10.10

White Balance


This week we're taking a break from the triad of Shutter speed, Aperture and ISO to talk about White Balance. 

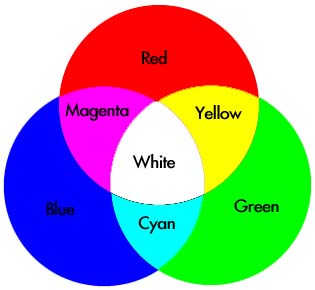
First up, some basic science.  For the purposes of this tutorial, let's think of light as a wave.  Visible white light is made up of all the colours of the rainbow.  Each colour has a slightly different wave frequency and travels through space with a different energy or temperature.  When all the colours are added together we see white light. Below you will find a copy of a colour wheel for light - in a later post we'll be talking more about this wheel and how it can help you with photography, but for now its enough to understand that different colours have different temperatures.

Now, intuitively and practically we know that at different times of the day the temperature outside varies.  Cooler at sunrise, hotter at midday and cool again at sunset.  It therefore makes sense that at different times of the day, different colours (with different temperatures) will dominate the light spectrum.  We often don't see these differences because our brains are programmed to see light as "white" and will balance what our eyes see automatically.  Yep, our brains have a very clever, inbuilt automatic white balance!  Unfortunately our cameras do not and without correcting for white balance we can sometimes end up taking funny looking photos where the colours look completely out of whack.  In the photo below, shot undercover the colours are much too yellow.

ISO125, f/2.8, 1/100, AWB

Now let's just digress momentarily and image we're heating a piece of metal over a fire.  At first it turns red, then blue and then white.  As it cools down it will change back to blue, then red again.  This is exactly what light does during the day.  At sunrise and sunset, visible light will be slightly redish/orange, as the day heats up blue with dominate and at the hottest part of the day visible light will be mostly white.  Different light sources also have different colour temperatures, for example, fluorescent light gives a green-ish hue.  Correcting for white balance or correcting for colour cast simply means that you adjust your cameras settings taking into consideration the colour cast (temperature) of the prevailing light. 
 
Unless you have using a very old camera, your camera should have something called AWB, or Auto White Balance.  This is your camera's "brain" trying to naturally bring everything it 'sees' back to a neutral white colour.  Mostly it does a good job, but sometimes you photos will look unrealistically red or blue or green.  This can be corrected in post-processing, or you can try to change it "in camera" by adjusting your white balance based on the conditions.

Both my Canon IXUS P&S and my Canon 400D have rougly the same white balance settings.

My DSLR also has a custom white balance - this allows you to program the white balance you want, by taking a photo of a white or coloured piece of paper.  The  camera's internal computer will convert this into a white balance setting allowing you to customise the white balance to your specific needs.

By changing my white balance to the prevailing conditions I can be more confident that my photos will be 'true to life' colours, particularly in difficult lighting conditions.
ISO100, f/4.5, 1/250, AWB

In the photo above, I was shooting on a sunny day and had our orange sun-blind covering the balcony.  The overall effect is a really yellow/orange photo.  But look what happens when I change my white balance settings to Tungsten, which effectively provides a blue filter to the camera. and stops some of the red light  being absorbed.  The colours are much more realistic and with some post-processing this photo will 'pop'.  Click here, if you want to see my final processed photo.

ISO100, f/4.5, 1/250, TUNG

If you get the white-balance wrong "in camera" it is also possible to change it with some simple editing.  Most editing programs will allow you to add a filter to the photo.  Below you can see what happens when I add a blue filter to the Japanese vegetables - again a much more 'true to life' look.

ISO125, f/2.8, 1/100, AWB - (blue filter added in editing stage)

The other way to use these settings is to enhance your photos.  For example, say you want to really enhance a sunset photograph and get the maximum "golden" cast possible.  If you set your camera to 'Sunny' WB, you would be effectively adding a red filter to your photograph resulting in an enhanced sunset.  (Remember from above that sunny conditions are relatively "hot light temperatures" creating blue/white colour casts and to balance this out the 'Sunny' WB adds a red filter.) 

A word of caution: If you do alter your white balance settings, try to ensure you set it back to AWB at the end of your photo session.  There is nothing worse than picking up your camera, taking a few photos and having them all come out looking terrible because you had your white balance on flourescent after last weeks birthday party and now you're taking pictures in the midday sun!

The take-home message for this week is that white balance and colour casts are related to the temperature of the light when you take the photo.  You can correct colour cast by changing your white balance setting in camera or adding a filter in the post-processing stage.  Secondly, white balance can allow you to enhance your photographs by effectively adding a filter to enhance the current light conditions.

Next week: Isolating ISO