

Two weeks ago we talked about shutter speed. This week it's all about ISO. Most automatic cameras will allow you to play with ISO. Get out your manual (yes really) and see if this option is available for your camera, it's something everyone can use to improve their picture taking skills. My Canon IXUS has an ISO range from 80 - 1600.
ISO stand for "International Organisation for Standardisation" and comes from the greek work isos, meaning equal. I find it easiest to understand ISO if I think about film photography. Film photography is based around the concept of light passing through a material (film) and the film absorbing the light to differing amounts to create a 2D image. Here there are two things interacting with each other - the amount of light reaching the film and how reactive the film is to light. ISO describes the second element - the films potential to absorb light. The higher the ISO, the better the film is at capturing light. Put another way - film with a high ISO allows you to take photographs in situations without much light. If you are using a film camera, as a general rule, you cannot simply "change" the ISO but need to choose different films with different characteristics.

Photo 1934 by Marianne Breslauer
Now, lets convert that knowledge into digital photography. The same concepts can be applied here. The higher the ISO, the more light sensitive the camera is and the better it is at taking pictures in dark situations. A fortnight ago we talked about the relationship between shutter speed and camera shake, and how without a tripod, at slow shutter speeds your photos will be out of focus due to your hands natural shake. One way to get around this in dark situations is to increase the ISO. The camera will now need less light to capture the same image and you can use a faster shutter speed (and therefore avoid a tripod and blurred photos).
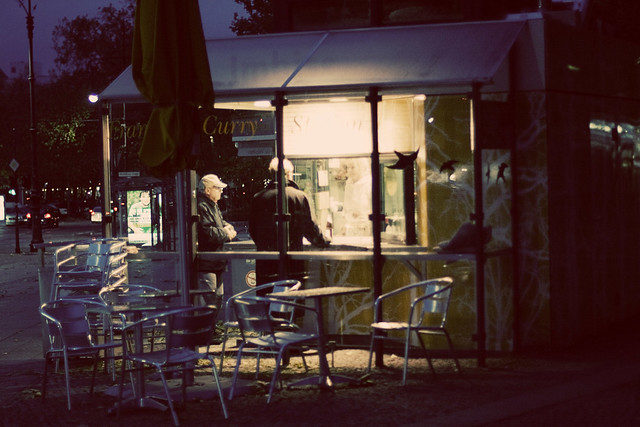
ISO 800, f/1.4, 1/160
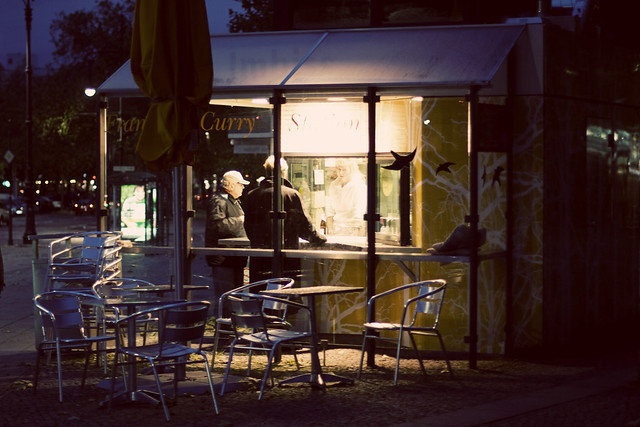
ISO200, f/1.4, 1/25
The above pictures aren't the greatest of subject material, or quality, but I was a little rushed lastnight trying to finish off this post (oops). But they still illustrate the point I wanted to explain. In the first photo at ISO800 I could use a shutter speed of 1/160, whereas to capture the same image with my ISO set to 200 I needed a shutter speed of 1/25.
The downside of a high ISO is that you sometimes get grainy images. This is commonly referred to as "noise".
 In digital photography the noise is caused by the camera not "seeing" the colours correctly and blurring pixels together. How well your camera 'sees' at higher ISO range is, unfortunately, really a cost thing. The more expensive the machine, the better it is at coping with the higher ISO ranges. However, you can still use even small ISO ranges (100-400) to your advantage, as I will explain in the next few weeks.
Next Week: Capturing Reflections

18 comments:
very interesting stuff, thankyou. I never go above 800 on my camera,I need to experiment more.
i love your photo know how ! merci :)
That is so interesting...Thanks for the tips:)
Happy Monday
i'm going to practice this! I typically "get" ISO and adjust it during the day, but I'm intimidated at night pictures...
Can I just say that I took a photography class and came away totally confused about ISO. You just made it sooooo much clearer. I am your newest follower and intend to learn A LOT!!!
Thank you!
AForeignLand.blogspot.com
i never knew this!!!
*kiss kiss*
Erika
PS - love for you to stop by and :
*Enter Camille Beckman Luxury Give-Away Here*
oh wow thank you for this. my friend would love to read about this! thank you!
My digital photography teacher should take notes on your blog. While I understand ISO...here we are in week 7 of class and most of my classmates are still wrapping their brains around this concept....If my teacher explained things as well as you do-my classmates would be getting better educated. Thanks Clare....and I love that B + W of the groovy girls sunnin' and smokin'.
Happy day to you.
great lesson!!
You changed your blog design(?)
I like it!
Thank you so much for sharing this here. It is truly very helpful to me.
i have never thought about ISO in my life. It's time I did, clearly. thank you.
i love your blog and this post was very helpful :) i'm going to be buying my first "real" camera soon and need all the helpful hints and tips i can get!
great post. i used a little ISO magic in a night shot last night. a little noise, but worth it to capture the moment.
You are so amazing. It is such a thorough post. Very informative and helpful.
Rachael
Another awesome post, I'm learning so much!
What a great tutorial. I work in a very small range in terms of ISO, although my camera is capable of a greater range...I really should try taking pictures at night.
Thank you for sharing your knowlage :)
This is great, thanks for the tips!
Post a Comment