Short and sweet this week, but a great effect...
Over the last couple of weeks we've been talking about ISO and Shutter speed. I thought it might be fun to turn back to composition. Today I'm going to be teaching you all an incredibly simple trick which can give you really cool effects. It's also a technique that is difficult to execute unless you use Program Mode or Automatic and can be done with any camera. Today we're talking about reflections.
 First step:
 Set your camera to program mode or automatic. If you're using automatic, make sure you switch the flash off.
Second step: If you can, adjust your ISO to an apropriate level
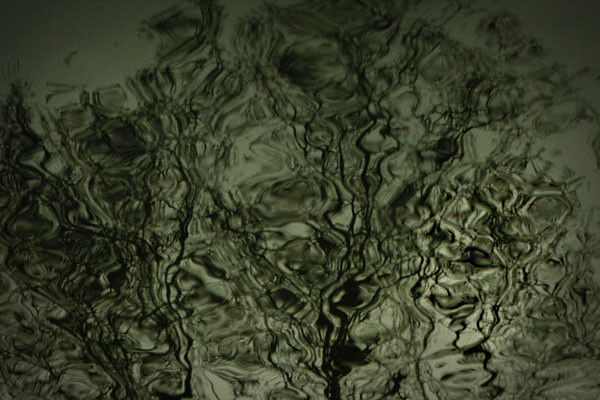
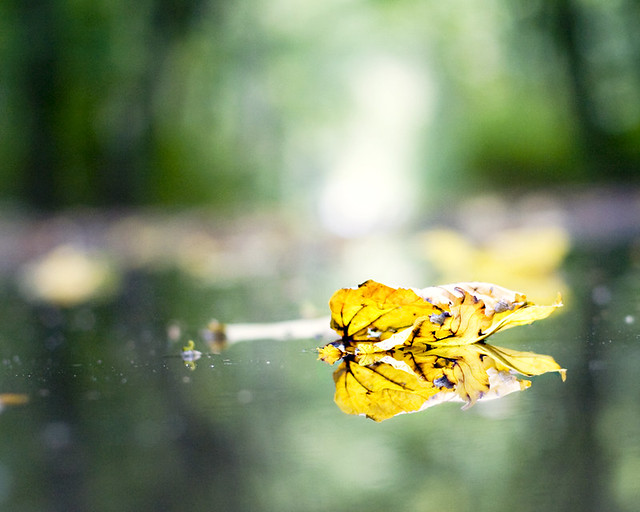
Third step: Find some water - it doesn't have to be particularly deep or big - the photo on the left was taken using a muddy puddle which only had about 1-2cm of water in it.
Fourth step: Try to get your camera as close to the water as you can, without actually touching it. The camera body and lens should be at a 90 degree angle to the water surface.
Fifth step: Take your picture!
Sixth step: Have a look and laugh about how bad you are at keeping your camera straight.
Seventh step: Repeat steps 4-6 until you are happy with the photo (be patient, you'll get better at it).
That's it!
I told you - easy-peasy. And you can do this with almost any body of water. The best reflections will come when the water is still, although you can get some creepy looking effects with all the trees going loopy by throwing a few sticks into the water as you take the shot.
Fun, huh?
Next week: Aperture